Showing posts with label dessert. Show all posts

Monday, June 2, 2014

Quick Dessert: Ooey Gooey Chocolate Cobbler


Don’t you hate it when you’ve signed up to cook something and completely forget about it until the last possible moment?

I can’t tell you how many times that has happened to me. It’s probably a shameful amount, and I’m working on that. However, it’s probably because of my poor planning that I’ve become really good at whipping up dishes in a short amount of time.

This time, I signed up for dessert at growth group. I thought I was ready to go. I had gotten my homemade Oreos ready to go, and I took them… a week early. SIGH.

The next week, I was scratching my head, looking for a fun and effortless dessert that would leave everyone satisfied, and I found this lovely chocolate cobbler recipe. I normally love lots of steps so I can watch the dessert grow or come together, but I appreciated how this all came together so quickly and was perfect. 


You can eat it warm, with some ice cream on top, or you can eat it by spoonfuls from the dish, without any judgment from me. Enjoy.


Ooey Gooey Chocolate Cobbler

Ingredients
  • 1 cup flour
  • 1/2 teaspoon salt
  • 1 1/2 teaspoons baking powder
  • 1/2 cup sugar
  • 2 tablespoons plus 1/4 cup cocoa powder
  • 1/2 cup milk
  • 3 tablespoons vegetable oil
  • 1 cup packed brown sugar
  • 1-3/4 cups hot water

Instructions
  • To start, Preheat your oven to 350ºF.
  • In a bowl, combine your flour, salt, baking powder sugar and 2 tablespoons of the cocoa powder with a fork. 
  • Pour the milk and oil into your dry ingredients, stirring it slowly to keep any dry pockets from forming. 
  • Pour into a baking dish (mine is a 9x9-inch square). 
  • Combine the brown sugar and remaining cocoa. This will serve as the "crumble" for your dessert. I truly wasn't sure what this would look like, but it is delish. Sprinkle your mixture over the batter. 
  • Now, for the odd part. Pour hot water over the top of your dessert. Don't stir it. Just leave it.  
This WILL be beautiful in the end, I promise. 
  • Bake for 40-45 minutes.
Told you!
What I like about this particular dessert is that it comes with its own gooey syrup to swirl around. You'll be fighting to see who eats the last spoonful. 


Monday, May 26, 2014

Homemade Oreos... Sinfully Delicious

My friends are super supportive in my writing and cooking endeavors. Chances are, they get to eat the products I play with in the kitchen, so it’s not like they’re forced to endure my talking about these delicacies in vain. One of my closest friends, Jamie, actually got me a great book for my birthday “The Mac + Cheese Cookbook”, and I’ve been drooling over everything in here since.

It usually takes me forever to come up with the courage to try a recipe from cookbooks, but there was one in Arevalo and Wade’s book that I couldn’t wait to create: the homemade Oreos.


First, I made them for Mothers Day, and gave them as gifts to my mom, aunts and grandmother. My husband was livid – I didn’t have any leftovers for him. The next time I made the Oreos was for our church group. They were inhaled, and Matt was very happy for the leftovers.

Since everyone loved them, I figured I’d share them with all of you. They’re not particularly hard to make, and very easy to enjoy with your friends. (Unless you’re like my husband. Then you’ll wolf them down without sharing.)

Homemade Oreos


Cookie Ingredients
  • 1 ¼ cups all-purpose flour
  • ½ cup cocoa powder
  • 1 ½ cups white sugar
  • 1 teaspoon baking soda
  • ¼ teaspoon baking powder
  • ¼ teaspoon table salt
  • ½ cup plus 2 tablespoons unsalted butter, softened
  • 2 eggs
  • 2 teaspoons kosher salt, for topping

Frosting Ingredients
  • ¼ cup unsalted butter
  • ¼ cup shortening (I used lard!)
  • 2 cups powdered sugar
  • 2 teaspoons vanilla extract

Instructions 
  • Preheat your oven to 3750F. Prepare your baking tray with parchment paper.

  • To make your cookies, start by mixing your flour, cocoa powder, sugar, baking soda, baking powder, and salt. I used a fork, and carefully sifted until the mixture looked like sand.


  • Add your butter and eggs to the dry mixture, using your hand mixer on a low setting. Now your mixture will look like wet sand.


  • Scoop out your dough into small balls, roughly smaller than a tablespoon. Make sure that you don’t make the dough balls too large, otherwise they won’t cook properly, and will be overly large. Sprinkle the topping with sea salt. 


  • Bake your cookies until the dough starts to crack and puff up slightly. This will be approximately 6 minutes. These cookies will look underdone, and that’s ok! They are supposed to be soft. Let them cool on the tray. 

Now, for the filling!

(If you have a heavy duty mixer, here’s where you want to pull it out.)

  • Blend your butter and shortening (lard).

  • Slowly add your powdered sugar and vanilla, half cup at a time. Blend until it’s smooth.
  • Place your filling in a pastry bag, or if you’re on a budget, in a heavy duty gallon bag with its tip cut off one corner.
  • Once your cookies are cooled, pipe a dollop of filling in the middle, and press the remaining cookie on top.

 
Don't mind my larger cookies. I couldn't help myself.


  • Take your shot and try to dip this bad boy in a glass of milk, and enjoy!

Friday, April 11, 2014

Andrea's Easter Peanut Butter Chocolate Chip Cookies


Easter’s coming! It’s a great time for many reasons (one of which being that my birthday is near), and for many, this is a time for gathering with family and reflection of one’s faith.

Afterward, you gather, you celebrate, and you eat. If you’re a kid, there’s a high probability that you’ll get to go on an Easter egg hunt. If you’re an adult, there’s an even higher possibility that you’ll steal all of your kids’ good candy.

I wish that I could make homemade candy, but I’m no confectioner. I wish I could make chocolate covered peanut butter eggs like so many wonderful food bloggers. However, I am terrified of chocolate dipping (mostly because I'd probably eat it all before the dipping commenced).


I am however, a cookie person. So I asked myself: what can I do to marry chocolate peanut butter eggs and cookies? I scoured my go-to recipes, and found a great recipe that was perfect. 

It had everything that I was looking for in a cookie - the crumbliness from peanut butter, with the sweet decadence of chocolate. Enjoy this recipe while your kids are out in the yard. It'll be hard to share them otherwise.


Andrea's Easter Peanut Butter Chocolate Chip Cookies


Ingredients:
1/2 cup (1 stick) butter, softened
1/2 cup chunky or smooth peanut butter
1/2 cup granulated sugar
1/2 cup brown sugar, firmly packed
1 egg
1 1/4 cups all-purpose flour (If you don't want crumbly cookies, omit 1/4 cup)
1/2 teaspoon baking powder
1/2 teaspoon baking soda
1/4 teaspoon salt
1 cup semisweet chocolate chips

Instructions: 


  • Preheat your oven to 375 degrees and prepare your pans by lightly greasing them, or by covering them with parchment paper.
  • In a medium-sized bowl, blend your butter, peanut butter and sugars until they are smoothly mixed. 

Guess who was annoyed that she didn't get peanut butter?
  • Add the egg and mix until fluffy.
The egg adds a great lightness to your batter.

  • In another bowl, blend the flour, baking powder, soda and salt together. Once they are well mixed, begin to slowly add them to your butter batter.
Your batter will be crumbly. That's good. 
  • Add the chocolate chips, then cover your dough and stick it in your fridge for at least 30 minutes.
  • Drop cookie dough onto your baking sheets in rounded teaspoons. Bake for 10-12 minutes. (Note: please don't overcook these cookies. Since they're light, they WILL taste like char.)
  • Enjoy!


Thursday, March 27, 2014

Salty chocolate chunk cookies - the search for the perfect cookie, Part I

It's hard to find the perfect cookie. Trust me, I've tried. If you think that I'm merely joking, ask my husband, who's watched me scour through cookie recipes, tried and dabbled with many recipes. Even when I find a great recipe, I continue on, hoping for utter bliss in my mouth. As I find recipes that work, I'll share them. 


Now let me tell you about these cookies. Don't mind the salt; this recipe is delicious. Really. It's got an interesting mixture of flavors, and the salt sprinkled atop the cookies adds a new complement to the sweet that you wouldn't expect. I really liked this recipe for the fact that you've got two layers of sugar, and the rich batter is good all on its own. 

Hope you enjoy this with a huge glass of milk. 

Salty chocolate chunk cookies

Makes approximately 18-24 cookies, depending on your size preference

1 1/2 cups all-purpose flour
1 teaspoon baking powder
1/2 teaspoon kosher salt
1/4 teaspoon baking soda
1/2 cup (1 stick) unsalted butter, room temperature
3/4 cup (packed) light brown sugar
1/2 cup sugar
1/4 cup powdered sugar
2 large egg yolks
1 large egg
1 teaspoon vanilla extract
8 ounces semisweet or bittersweet chocolate 
flaky sea salt for sprinkling


  • Preheat your oven to 375°. 
  • Mix your flour, baking powder, kosher salt, and baking soda in a medium bowl, and then set the dry mix aside.


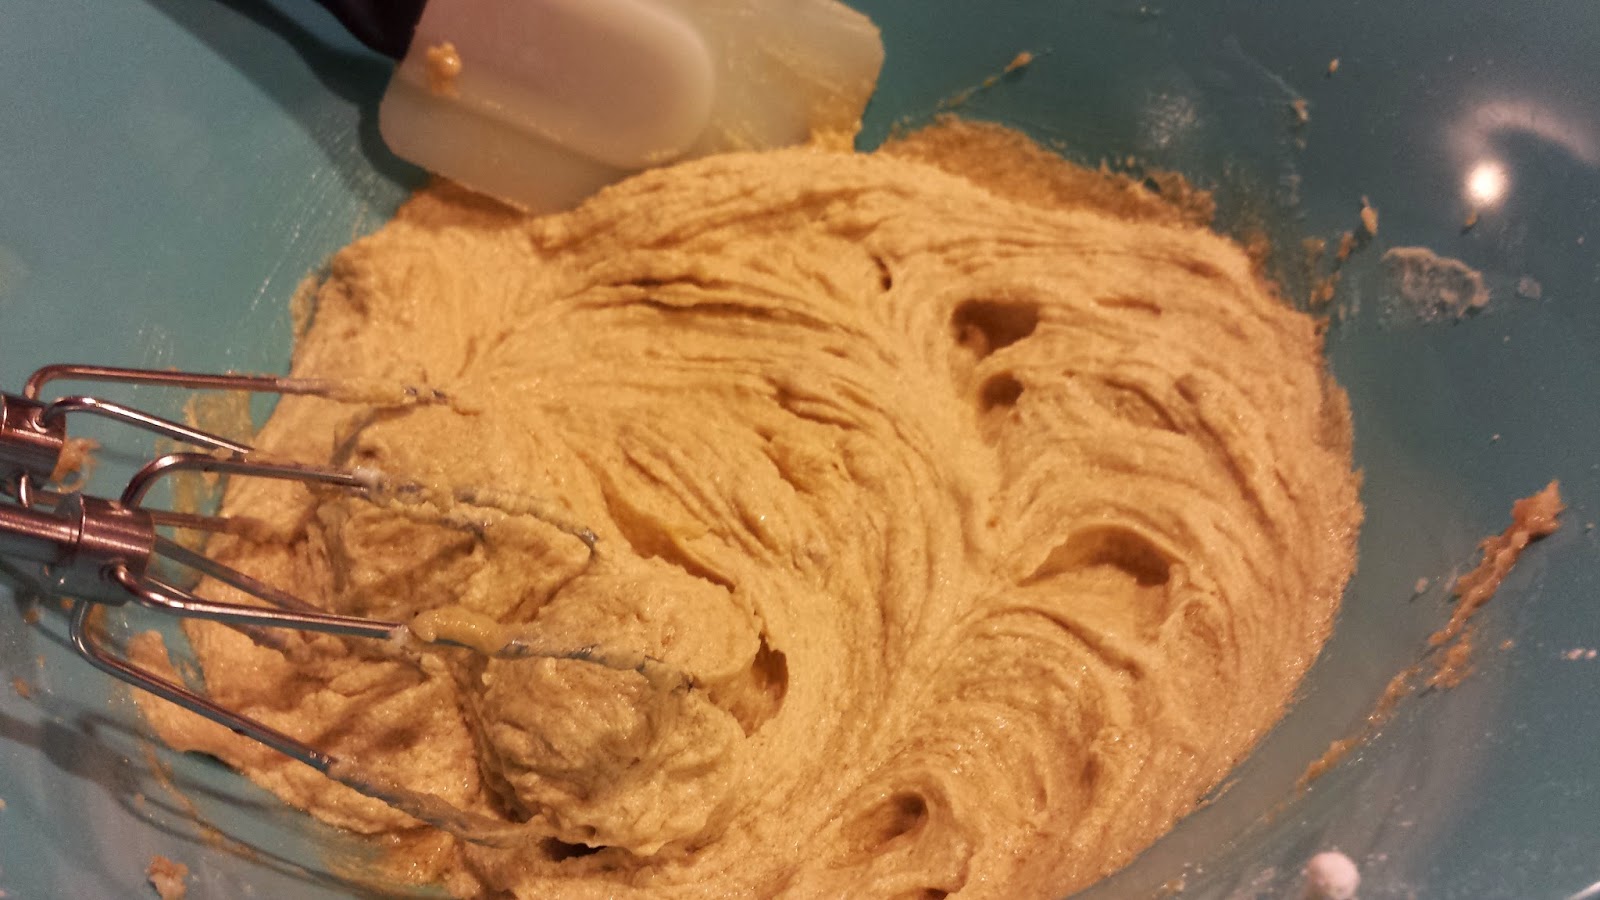
  • Using an electric mixer on medium speed, beat the softened butter, brown sugar, sugar, and powdered sugar until light and fluffy. This process will take approximately 3-4 minutes. 
It almost looks like a snowed in home.

Make sure your butter is completely soft, otherwise this won't work. 
  • Add egg yolks, egg, and vanilla to the wet mixture. Beat them in, occasionally scraping down the sides of the bowl, until mixture is pale and fluffy. This will take approximately 4-5 minutes. 

My dog really appreciated the egg whites.


  • Reduce mixer speed to low and slowly add in your dry ingredients, mixing just to blend. Gently fold in your chocolate. I followed the recipe, and this seemed to ask for less than most recipes. I'd add a smidge more next time. 
  • Chill your cookie dough for approximately 30 minutes to an hour. This makes the dough a lot easier to work with, and the cookies keep their shape as they bake.

  • Spoon rounded tablespoonfuls of cookie dough onto 2 parchment paper-lined baking sheets, spacing 1-inch apart. Sprinkle cookies with sea salt.


  • Bake cookies, rotating sheets halfway through. This will let your cookies cook more evenly, as there might be some cooler spots in your oven. Cook the cookies until they are golden brown around the edges. This will take 10-12 minutes. (Note: your cookies will be soft, and will firm up as they cool). Let cool slightly on baking sheets, then transfer to wire racks; let cool completely.


Sunday, March 23, 2014

Beautifully wonderful brownies

Have you ever made a dessert recipe that leaves you wanting to lick your fingers, your mixer, your bowl? Have you ever wanted to make a batch of something sweet that was so wonderful that you didn't want to share?

This fast, simple and delicious recipe for brownies, adapted from Allrecipes, is that for me. I shamelessly licked up any brownie mixture that got onto my hands, and you'd better believe I licked up the leftover frosting from the bowl after spreading it on these bad boys. 


Beware: if you make this recipe, you're going to end up eating everything by yourself. You've been warned. 


Beautifully wonderful brownies


Brownie batter
1/2 cup butter, softened
1 cup white sugar
2 eggs
1 teaspoon vanilla extract
1/2 cup unsweetened cocoa powder
1/2 cup all purpose flour
1/4 teaspoon salt
1/4 teaspoon baking powder


  • Preheat your oven to 350 degrees F, and grease an 8-inch square pan.
  • Mix your butter, sugar, eggs, and vanilla together in a medium-sized mixing bowl. 
Make sure your butter is very soft to allow for good mixing.

  • Slowly stir in your cocoa, flour, salt, and then baking powder. 
  • Spread the batter into your pan.
  • Bake your batter for 25 to 30 minutes. Be careful not to overcook these brownies. They might not look completely cooked, but they will continue to cook once they are removed from the oven.
Poke with a fork to check for complete cooking. 
As your brownies cool, you can make your frosting. With this easy recipe, you'll never want to buy frosting again.

Frosting mixture
3 tablespoon butter, softened
3 tablespoons unsweetened cocoa powder
1 tablespoon honey
1 teaspoon vanilla extract
1 cup powdered sugar


  • Mix the ingredients, and spread onto the brownies as they are still warm.
  • Allow the brownies to cool completely before you remove them from the pan. 
You can eat these without the frosting, but isn't that the point of living?

    Friday, February 21, 2014

    Quick blueberry biscuits... in under 30 minutes!

    We had a dinner party go bust today. Matt was going to have a friend over, and I was supposed to cook a beautiful meal for all of us to enjoy. But… then Matt had to work late. I had a headache. We were both tired. It was downhill from there.

    I felt badly that I wasn’t going to make something, so I looked online for something sweet and simple that I could put together quickly. I had a small basket of blueberries, and had a hankering for something comforting. I found this recipe on Plain Chicken, and the biscuits were heavenly.


    Quick blueberry biscuits


    Approx. 14 biscquits

    2 1/4 cups Bisquick
    1/3 cup sugar
    1 cup wild blueberries
    3/4 - 1 cup buttermilk (I used fat-free)

    • Preheat oven to 450.
    • Stir together bisquick, sugar and buttermilk until soft dough forms. Fold in blueberries. 

    Your dough will be wet.

    Be careful to not over-mix the blueberries!

    • Scoop dough with large cookie scoop or ice cream scoop (3 tablespoons) onto ungreased cookie sheet. 


    • Bake 9-12 minutes or until golden brown.


    If this isn’t enough sweet for you (it was for me), add an icing to the biscuit.
    You’ll need:
    1/2 cup powdered sugar
    1 to 2 Tablespoons milk

    Combine powdered sugar and milk. Drizzle over biscuits.


    Friday, February 14, 2014

    Sugar Donut Muffins for your Valentine Love Muffin

    Happy Valentine’s Day!

    I hope you are enjoying yourselves, regardless to whether you are single or in a relationship. I love Valentine’s Day because people are extra affectionate, and my students give me chocolate. No matter what, I win.

    It’s also the first Valentine’s Day that I get to share with my new husband. Last year, my hubs was living 2,000 miles away, and while we were together for the holiday, it was bittersweet because we both knew our time together had an expiration date.

    This year, we got to wake up late, and I decided to surprise my husband with something a little sweet. Matt’s not a big fan of breakfast foods in general, but will eat them when forced. Getting Matt to eat things that are delicious, good for you, and fun to make became a life mission.

    This recipe for sugar donut muffins, pulled from Stylish Cuisine, hit two of my three requirements. I definitely recommend it for any time you want something sweet, but aren’t in the mood for something elaborate.

    Sugar Donut Muffins
    approx. 10 servings regular muffins, 24 mini-muffins


    ¾ cup sugar
    1 large egg
    1 ½ cups all purpose flour
    2 tsp baking powder
    ¼  tsp salt
    ¼  tsp ground nutmeg **I used a scant ¼ of allspice instead because of allergies
    ¼  cup vegetable oil
    ¾  cup milk 

    1 tsp vanilla extract
    2 tbsp butter, melted
    ½ cup sugar, for rolling

    1. Preheat oven to 350F. Lightly grease a muffin tin with cooking spray or vegetable oil.
    2. Eggs and sugar mixture should
      be light and airy
      In a large bowl, beat together sugar and  egg until light in color.
    3. In a small bowl, whisk together flour, baking powder, salt and nutmeg. Pour into egg mixture and stir to combine. Pour in vegetable oil, milk and vanilla extract.

    4. Divide batter evenly into 10 muffin cups or ~24 mini-muffin cups, filling each about 3/4 full.

    5. Bake for 15-18 minutes for standard-sized muffins or 11-12 minutes for mini-muffins, until a tester inserted into the center comes out clean. I decided to try out the suggestion I'd read about, and immediately lowered the temperature of the oven to 325 degrees once I put in my muffins, and added a few minutes to my cooking time. This let my muffins rise nice and high. HOWEVER, if you pull them out too soon, they look like little bald men heads on top. Cook all the way through!

      Look at that lift.

    6. While muffins are baking, melt butter and pour remaining sugar into a small bowl. When muffins are done, lightly brush the top of each with some melted butter, remove from the pan and roll in sugar. Cool on a wire rack.


    These things are perfect as they are.

    My husband decided that he wanted to eat these bad boys with buttercream frosting, because... sugar tastes better with sugar. *sigh*

    So to get back at him for that, I sent him, the biggest Bears fan ever, this lovely Valentine's E-Card. 


    Hope you enjoy your Valentine's Day!