Showing posts with label baking. Show all posts

Sunday, July 27, 2014

The Basics: Pizza Crust to Build Flavors On!

I want to take a minute and apologize for not posting recently. I’m a teacher by trade, and with summer vacation comes the search for summer work, which then leads to my working over an hour away from home.

On top of working, my Mister and I have been trying to squeeze in small vacations here and there, enjoying a little bit of the summer.  With that impact on my time and schedule, it’s really hard to cook frequently, much less have time to post. However, that doesn’t mean I haven’t been missing you all. Really, I have.

So to make it up to all of you, I’m going to post a favorite staple at the Estrada home – pizza dough. This isn’t the first pizza dough I’ve put on this blog, but it is a rising crust recipe that can be developed and tailored to your preferences.


I like my dough simple, while Matt likes his with a stuffed crust and butter/garlic coating before he bakes it. Whatever your preference is, start with this basic recipe, and build it to your personal enjoyment. I hope you have a wonderful day!


Beautifully Basic Pizza Dough


1 packet dry yeast
1 cup warm water (it should feel warm enough to bathe in)
1 teaspoon sugar
1 teaspoon salt
2 ½ cups flour

  • Pour your water into a medium sized bowl, then sprinkle the yeast onto the water.


  • Pour in the sugar and give the mixture a small stir. You’ll notice the yeast will start to bloom after a few minutes. Allow it to stand for about 5 minutes, then add the salt.


  • Stir in one of the cups of flour, making sure the mixture is completely smooth. Add your remaining flour in small increments, until all of the flour is absorbed. 


  • If you are using a mixer, 6 minutes on medium speed with your dough hook should do it. If you are using your hands, wash them with cold water and knead for about 10 minutes, or until you do not feel lumps.


  • Roll your dough into a ball, cover with a clean towel and allow it to sit for 30-40 minutes in your warm kitchen.
 
Nice neat ball, before. 
Beautiful dough, nearly 40 minutes later.

  • Divide your dough into two even portions (each portion is enough for a medium-sized pizza). If you are going to only use one of the portions, tightly wrap one of the dough balls and place in the fridge. What you do use can be flattened into traditional pizza sizes at this point. 


  • Now it's time to build your pizza to your preference! Use your favorite toppings, sauces and crust ideas.

We made barbecue chicken pizza. It's SUPPOSED to be a dark sauce, I promise. 

  • Bake 450 degrees for 15-17 minutes, based on how crispy you want your crust.  (Note: If you have put a lot of toppings on your pizza, you will need to add time to your baking.)


Thursday, July 3, 2014

Easy Buttermilk Biscuits... from Scratch!

Biscuits are not unfamiliar at our home. They are one of Matt’s favorite breakfast dishes, especially when paired with sausage. I love biscuits with melted butter and raspberry jam, and can eat them by the plateful.


It’s hard to find a flaky, flavorful recipe for buttermilk biscuits that doesn’t involve a pre-made mix, or that doesn’t feel painfully excruciating and complicated. That’s why I love the recipe found in Mac and Cheese Cookbook by Allison Arevalo and Erin Wade.

These lovely cooks suggest not over-mixing your dough, which allows for a fluffier, lighter biscuit. I was skeptical at first, but after eating these beauties, I have a hard time believing I’ll try anything else. As a bonus, this biscuit recipe is deceptively simple, making them a perfect choice for brunch, breakfast and snack time.  Enjoy!

Easy Buttermilk Biscuits 


Ingredients: 
2 cups all-purpose flour
1 tablespoon sugar
1 tablespoon baking powder
½ teaspoon kosher salt
8 tablespoons cold unsalted butter, plus melted butter for topping your biscuits
1 cup buttermilk

Instructions:
  •  Preheat your oven to 450°F. Grab a baking sheet and line it with parchment paper. 

  • Mix your flour, sugar, baking powder and salt. 


  • Cut your butter into small chunks or pats, and slowly incorporate the cold butter into your flour. Use your pastry cutter to blend (if you’ve got a mixer, use your paddle attachment on a low speed). Your batter will be coarse. 


  • Add your buttermilk and mix your batter until the ingredients are barely mixed together.


  • Turn your dough out onto a floured surface, and pat it into a thick round, about an inch thick.


  • Take a cookie cutter and cut rounds of dough (about 2-inches in diameter). Place them onto your lined baking sheet, and brush them with melted butter. 


  • Bake for about 10 minutes, or until your tops are a nice, golden brown. Allow them to cool, and then enjoy them by the bunches.


Friday, April 11, 2014

Andrea's Easter Peanut Butter Chocolate Chip Cookies


Easter’s coming! It’s a great time for many reasons (one of which being that my birthday is near), and for many, this is a time for gathering with family and reflection of one’s faith.

Afterward, you gather, you celebrate, and you eat. If you’re a kid, there’s a high probability that you’ll get to go on an Easter egg hunt. If you’re an adult, there’s an even higher possibility that you’ll steal all of your kids’ good candy.

I wish that I could make homemade candy, but I’m no confectioner. I wish I could make chocolate covered peanut butter eggs like so many wonderful food bloggers. However, I am terrified of chocolate dipping (mostly because I'd probably eat it all before the dipping commenced).


I am however, a cookie person. So I asked myself: what can I do to marry chocolate peanut butter eggs and cookies? I scoured my go-to recipes, and found a great recipe that was perfect. 

It had everything that I was looking for in a cookie - the crumbliness from peanut butter, with the sweet decadence of chocolate. Enjoy this recipe while your kids are out in the yard. It'll be hard to share them otherwise.


Andrea's Easter Peanut Butter Chocolate Chip Cookies


Ingredients:
1/2 cup (1 stick) butter, softened
1/2 cup chunky or smooth peanut butter
1/2 cup granulated sugar
1/2 cup brown sugar, firmly packed
1 egg
1 1/4 cups all-purpose flour (If you don't want crumbly cookies, omit 1/4 cup)
1/2 teaspoon baking powder
1/2 teaspoon baking soda
1/4 teaspoon salt
1 cup semisweet chocolate chips

Instructions: 


  • Preheat your oven to 375 degrees and prepare your pans by lightly greasing them, or by covering them with parchment paper.
  • In a medium-sized bowl, blend your butter, peanut butter and sugars until they are smoothly mixed. 

Guess who was annoyed that she didn't get peanut butter?
  • Add the egg and mix until fluffy.
The egg adds a great lightness to your batter.

  • In another bowl, blend the flour, baking powder, soda and salt together. Once they are well mixed, begin to slowly add them to your butter batter.
Your batter will be crumbly. That's good. 
  • Add the chocolate chips, then cover your dough and stick it in your fridge for at least 30 minutes.
  • Drop cookie dough onto your baking sheets in rounded teaspoons. Bake for 10-12 minutes. (Note: please don't overcook these cookies. Since they're light, they WILL taste like char.)
  • Enjoy!


Wednesday, April 2, 2014

Garlic knots in under 30 minutes

My husband is a pasta fiend. He is perfectly happy eating spaghetti, lasagna, and ravioli every meal of every day. With that said, I happily indulge him. I’m all for a good plate of carbs.

Of course, nothing completes a plate of pasta like a delicious garlic bread on the side. Normally I just run to the grocery store to buy bread and throw it in the oven to toast it, but this time, I tried to make my own garlic butter knots.


The recipe, which I adapted to my own tastes, makes a batch of delicious rolls that pairs with pastas in red, white and blush sauces. If you’re like me, and are only just starting to make bread with yeast, this is the way to start. Enjoy!

Garlic knots


1/4 cups butter
1 cup milk
2 tablespoon active dry yeast
1 tablespoon honey
½ teaspoon salt
1 large egg
3 – 3 ½ cups all-purpose flour


  • Preheat your oven to 400 F, then line a cookie sheet with parchment paper.
  • In a small saucepan, melt your butter. 


  • When the butter is nearly melted, stir in the milk. You’ll want to stir the mixture until it reaches just above body temperature.

  • Add yeast and honey to a large mixing bowl. 

  • Once the milk mixture is at the right temperature, add it to the yeast and honey. Stir the mixture completely, and allow the mixture to stand for 10 minutes until it becomes foamy.
  • Add the salt and egg to your batter, and stir until combined.
  • Start adding your flour by adding an initial 2 ½ cups of flour to the mix.
  • Slowly add your remaining flour until dough cleans the sides of the bowl.
  • Knead your dough for about 5 minutes.
  • Lay out your dough, and shape your dough into a long rectangle, slicing the dough into 12 strips.

Try to keep the strips as even as possible for uniformity.
  • With lightly floured hands, shape each dough strip into a knot, and place the dough on prepared baking sheet.


  • Cover the knots and let the dough rest for 10 minutes.
  • Bake for about 9-12 minutes, or until lightly golden brown.

As you wait for your knots to bake, it’s time to make your garlic butter.

Garlic Butter for topping

2 tablespoons butter
2 cloves garlic, minced
1/2 teaspoon Italian seasoning
¼ teaspoon garlic powder
3-4 tablespoons grated Parmesan cheese (optional)

  • Stir together your ingredients for garlic butter.
  • After removing the rolls from the oven, brush each knot with your garlic butter, and enjoy.


Sunday, March 23, 2014

Beautifully wonderful brownies

Have you ever made a dessert recipe that leaves you wanting to lick your fingers, your mixer, your bowl? Have you ever wanted to make a batch of something sweet that was so wonderful that you didn't want to share?

This fast, simple and delicious recipe for brownies, adapted from Allrecipes, is that for me. I shamelessly licked up any brownie mixture that got onto my hands, and you'd better believe I licked up the leftover frosting from the bowl after spreading it on these bad boys. 


Beware: if you make this recipe, you're going to end up eating everything by yourself. You've been warned. 


Beautifully wonderful brownies


Brownie batter
1/2 cup butter, softened
1 cup white sugar
2 eggs
1 teaspoon vanilla extract
1/2 cup unsweetened cocoa powder
1/2 cup all purpose flour
1/4 teaspoon salt
1/4 teaspoon baking powder


  • Preheat your oven to 350 degrees F, and grease an 8-inch square pan.
  • Mix your butter, sugar, eggs, and vanilla together in a medium-sized mixing bowl. 
Make sure your butter is very soft to allow for good mixing.

  • Slowly stir in your cocoa, flour, salt, and then baking powder. 
  • Spread the batter into your pan.
  • Bake your batter for 25 to 30 minutes. Be careful not to overcook these brownies. They might not look completely cooked, but they will continue to cook once they are removed from the oven.
Poke with a fork to check for complete cooking. 
As your brownies cool, you can make your frosting. With this easy recipe, you'll never want to buy frosting again.

Frosting mixture
3 tablespoon butter, softened
3 tablespoons unsweetened cocoa powder
1 tablespoon honey
1 teaspoon vanilla extract
1 cup powdered sugar


  • Mix the ingredients, and spread onto the brownies as they are still warm.
  • Allow the brownies to cool completely before you remove them from the pan. 
You can eat these without the frosting, but isn't that the point of living?

    Saturday, March 8, 2014

    Amazing Apple Challah

    Now that I’ve overcome my fear of yeast, I really wanted to have some fun with sweet bread.

    There’s nothing better than a great piece of sweet bread, typically with fruit, toasted and buttered in the morning. I decided to make my own. I found a beautiful recipe for challah bread, and couldn’t wait to adapt it to my own preferences.


    This bread is light. It’s fluffy. The crust captures all of the delicious and makes you smack your lips. Enjoy!

    Apple Challah


    Bread ingredients

    2 tablespoons dry yeast
    1 tablespoon plus ¾ cup granulated sugar
    5 large eggs
    ¾ cup vegetable oil
    ¾ teaspoon kosher salt
    6 cups flour


    Filling ingredients

    1 large firm-tart apple, peeled, cored, and cut into small cubes½ cup raisins (I opted not to use these)
    3 tablespoons lemon juice
    2 tablespoons honey
    ½ teaspoon ground cinnamon
    1 egg yolk

    • Combine ½ cup of warm water, the yeast, and 1 tablespoon of sugar in a small bowl. Stir until the yeast dissolves. You need to wait for the mixture to activate, which should take approximately 10 minutes.
    • Take your hand mixer or (if you’re lucky) standing mixer, and beat the eggs at medium speed until blended. Add the oil, salt, and remaining ¾ cup sugar. Beat until pale in color. Add 2/3 cup of water and yeast mixture. Once this has been well blended, add your flour, one cup at a time.

     
    Your dough will be slightly dry.
    • Place your dough onto a floured surface and knead for 2 minutes (This can also be achieved with the use of a dough hook on your mixer for 1 minute at low speed). Put the dough in a lightly oiled bowl and coat the entire batter. Cover with plastic wrap and a kitchen towel and put in a warm corner of your kitchen to rise. Allow for the dough to double in size, which takes just about an hour.
    • Punch down the dough, rewrap with plastic wrap and a kitchen towel, and let the dough rise for another 30 minutes. It should puff up slightly, but it won’t get doubled in size.


    I used all spice instead of cinnamon; stupid allergies.
    • As you wait for this final rise, you can begin to make your filling. Take your apple, and toss it with lemon juice, honey, and cinnamon in a small bowl. Let sit for 20 minutes, and then drain any liquid. 

    • Take your dough, place it on a lightly floured surface and divide it in half. Divide each half into three equal parts. Roll out each of the three pieces to form a 12-inch strand, then try to pat each strand down into a flat rectangle. Spoon your apple mixture down the center of each rectangle. Fold over the dough to tuck your filling into place, and roll each rectangle, pinching the ends tight. You’ll end up with a 15-inch strand.
    • Preheat the oven to 400°F before you begin braiding the dough. Once the bread has risen, set the rack to the middle position.

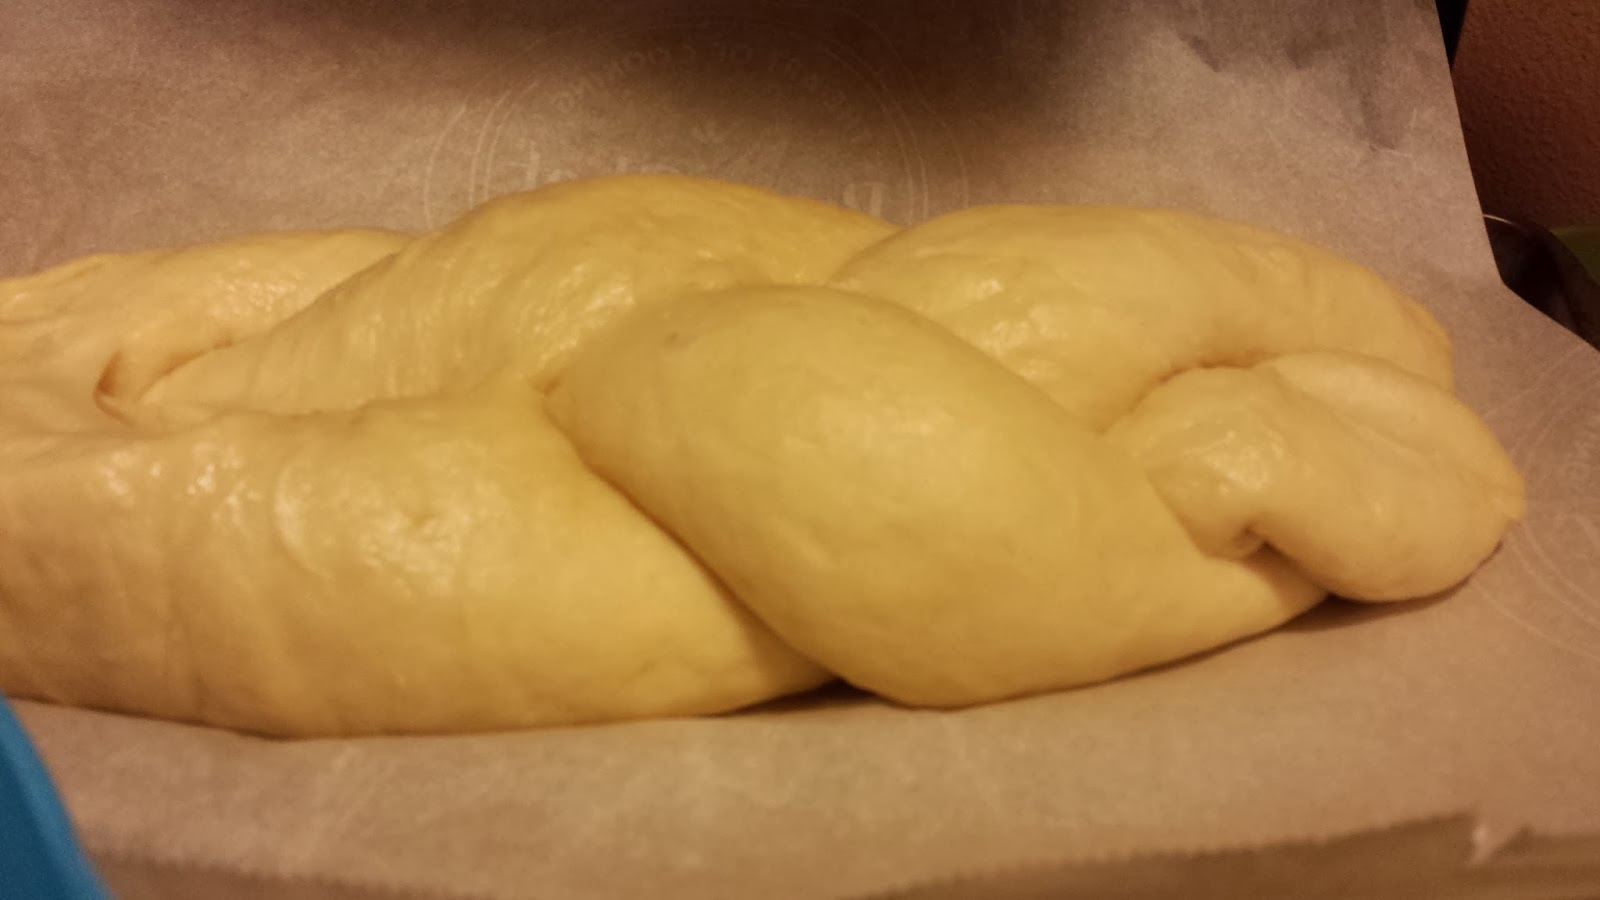
    • Now to make the bread. Put three of the ropes on a baking sheet. Braid the ropes together, and pinch at the top and bottom. Repeat with the other three strands on a separate baking sheet. Cover the loaves with kitchen towels, and let them rise for 45 minutes.


    • Whisk an egg yolk with 1 tablespoon water and brush over the tops of the loaves.

    • Finally, bake your loaves for 10 minutes, then reduce the heat to 350°F and bake until the crusts are browned and the bread is puffed and light, which should take another 30 minutes.

     
    Look at how pretty!
    • Transfer the loaves to a rack and let cool for 30 minutes before serving.