Thursday, March 27, 2014

Salty chocolate chunk cookies - the search for the perfect cookie, Part I

It's hard to find the perfect cookie. Trust me, I've tried. If you think that I'm merely joking, ask my husband, who's watched me scour through cookie recipes, tried and dabbled with many recipes. Even when I find a great recipe, I continue on, hoping for utter bliss in my mouth. As I find recipes that work, I'll share them. 


Now let me tell you about these cookies. Don't mind the salt; this recipe is delicious. Really. It's got an interesting mixture of flavors, and the salt sprinkled atop the cookies adds a new complement to the sweet that you wouldn't expect. I really liked this recipe for the fact that you've got two layers of sugar, and the rich batter is good all on its own. 

Hope you enjoy this with a huge glass of milk. 

Salty chocolate chunk cookies

Makes approximately 18-24 cookies, depending on your size preference

1 1/2 cups all-purpose flour
1 teaspoon baking powder
1/2 teaspoon kosher salt
1/4 teaspoon baking soda
1/2 cup (1 stick) unsalted butter, room temperature
3/4 cup (packed) light brown sugar
1/2 cup sugar
1/4 cup powdered sugar
2 large egg yolks
1 large egg
1 teaspoon vanilla extract
8 ounces semisweet or bittersweet chocolate 
flaky sea salt for sprinkling


  • Preheat your oven to 375°. 
  • Mix your flour, baking powder, kosher salt, and baking soda in a medium bowl, and then set the dry mix aside.


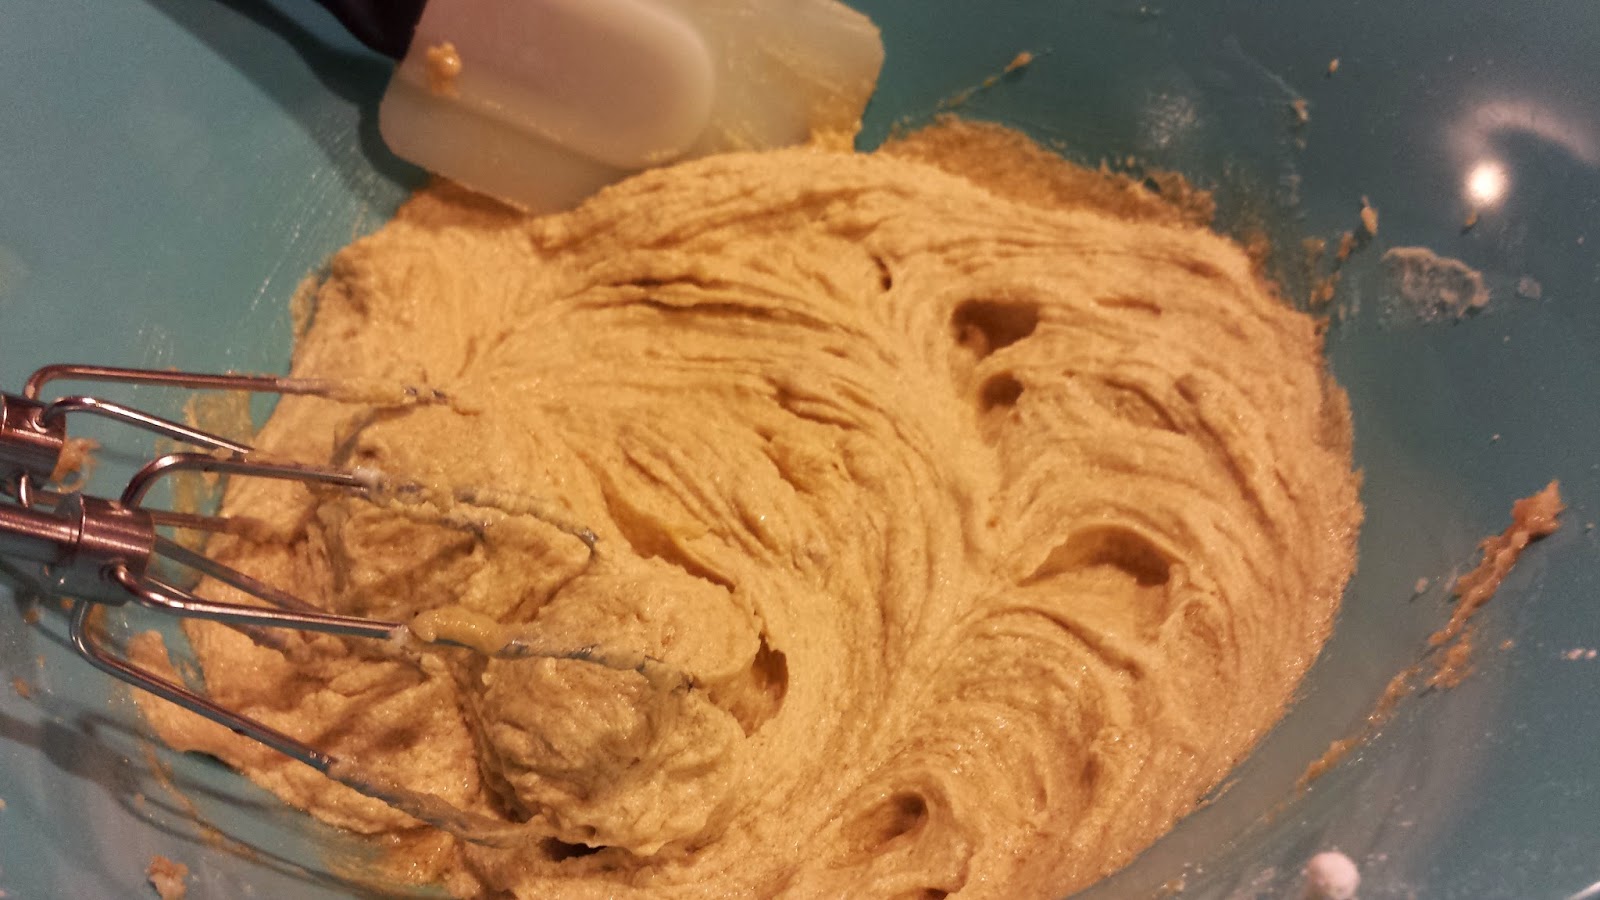
  • Using an electric mixer on medium speed, beat the softened butter, brown sugar, sugar, and powdered sugar until light and fluffy. This process will take approximately 3-4 minutes. 
It almost looks like a snowed in home.

Make sure your butter is completely soft, otherwise this won't work. 
  • Add egg yolks, egg, and vanilla to the wet mixture. Beat them in, occasionally scraping down the sides of the bowl, until mixture is pale and fluffy. This will take approximately 4-5 minutes. 

My dog really appreciated the egg whites.


  • Reduce mixer speed to low and slowly add in your dry ingredients, mixing just to blend. Gently fold in your chocolate. I followed the recipe, and this seemed to ask for less than most recipes. I'd add a smidge more next time. 
  • Chill your cookie dough for approximately 30 minutes to an hour. This makes the dough a lot easier to work with, and the cookies keep their shape as they bake.

  • Spoon rounded tablespoonfuls of cookie dough onto 2 parchment paper-lined baking sheets, spacing 1-inch apart. Sprinkle cookies with sea salt.


  • Bake cookies, rotating sheets halfway through. This will let your cookies cook more evenly, as there might be some cooler spots in your oven. Cook the cookies until they are golden brown around the edges. This will take 10-12 minutes. (Note: your cookies will be soft, and will firm up as they cool). Let cool slightly on baking sheets, then transfer to wire racks; let cool completely.


Sunday, March 23, 2014

Beautifully wonderful brownies

Have you ever made a dessert recipe that leaves you wanting to lick your fingers, your mixer, your bowl? Have you ever wanted to make a batch of something sweet that was so wonderful that you didn't want to share?

This fast, simple and delicious recipe for brownies, adapted from Allrecipes, is that for me. I shamelessly licked up any brownie mixture that got onto my hands, and you'd better believe I licked up the leftover frosting from the bowl after spreading it on these bad boys. 


Beware: if you make this recipe, you're going to end up eating everything by yourself. You've been warned. 


Beautifully wonderful brownies


Brownie batter
1/2 cup butter, softened
1 cup white sugar
2 eggs
1 teaspoon vanilla extract
1/2 cup unsweetened cocoa powder
1/2 cup all purpose flour
1/4 teaspoon salt
1/4 teaspoon baking powder


  • Preheat your oven to 350 degrees F, and grease an 8-inch square pan.
  • Mix your butter, sugar, eggs, and vanilla together in a medium-sized mixing bowl. 
Make sure your butter is very soft to allow for good mixing.

  • Slowly stir in your cocoa, flour, salt, and then baking powder. 
  • Spread the batter into your pan.
  • Bake your batter for 25 to 30 minutes. Be careful not to overcook these brownies. They might not look completely cooked, but they will continue to cook once they are removed from the oven.
Poke with a fork to check for complete cooking. 
As your brownies cool, you can make your frosting. With this easy recipe, you'll never want to buy frosting again.

Frosting mixture
3 tablespoon butter, softened
3 tablespoons unsweetened cocoa powder
1 tablespoon honey
1 teaspoon vanilla extract
1 cup powdered sugar


  • Mix the ingredients, and spread onto the brownies as they are still warm.
  • Allow the brownies to cool completely before you remove them from the pan. 
You can eat these without the frosting, but isn't that the point of living?

    Saturday, March 15, 2014

    Not your momma's chicken soup

    When I was a freshman in college, I had the worst cold I've ever had in my life. I couldn't breathe, slept all day, and was a complete zombie for a few days. I had never missed my mother the way I did while I was sick; I missed her giving me medicine, and most importantly, doting on me with some delicious chicken soup. 

    I would've killed for some soup. It immediately made me feel better, and I knew that the moment I started sipping the broth, my foggy state would clear. However, I was in the dorm. There were no Mexican mothers there, so I had the next best thing: cup of noodles. 

    I was so sad. It didn't do the job, especially since it didn't have the right texture, taste, or smell. 

    Now that I'm grown, I have crafted my own version of Mom's soup. It' delicious, hearty, filling and flavorful. Unlike some soups that call for itty bits of vegetables, my soup calls for large pieces, which add huge amounts of flavor. It'll keep for several days, but it probably won't last long. 


    If you're sick with a cold, or if you need to warm up from the cold, this is the soup for you. Enjoy.

    Not your momma's chicken soup

    4 chicken breasts
    2 large potatoes (can be substituted for 4-6 small potatoes)
    1/4 yellow onion
    3 garlic cloves
    1/2 tablespoon oregano
    salt, to taste
    2 cups frozen starchy vegetables of your preference
    2 medium zucchini
    1/4 lb. string beans
    1/4 cup cilantro
    avocado 


    • Place chicken breasts in a 7-qt Dutch oven or soup pot, and cover with water. There should be enough water for the chicken to be completely submerged. It will float. Add the onion and garlic, and allow your chicken to boil on medium high for 45 minutes. Cover your pot, but leave it cracked so that steam may escape. Once your chicken has fully cooked, salt the broth to taste. Add your oregano.
    The water will get murky as the chicken begins to cook.
    • Carefully and thoroughly scrub your potatoes. Cut your potatoes into halves (if you use smaller potatoes, they may stay whole), and place into the water with the chicken. I leave the skin on so that your potato stays intact. Your potatoes should cook completely, but not dissolve, about 20 minutes, depending on the potato.
    Since this potato is medium sized, I cut it in half. Some might need to be cut into thirds.
    • Pour your frozen vegetables into your soup. I prefer broccoli, carrots, corn and cauliflower. Allow for your vegetables to defrost. 
    Your soup will start smelling heavenly.
    • Carefully clean your zucchini, string beans and cilantro, cutting off ends. Place them into your pot whole, and allow to boil, approximately 10 minutes.

    • Serve carefully, so as to not dissolve the vegetables. One way to keep your vegetables intact is to place them in a separate container while serving, and pouring broth over them once they have been served on top of the chicken. Garnish with avocado slices.

    • To really enjoy your soup in true Mexican style, serve with Spanish rice, salsa, and tortillas. It'll clear up any sniffles you have, guaranteed!
    I can't really guarantee this will heal you. Sorry. 

    Monday, March 10, 2014

    Beautiful buttermilk fried chicken

    Sometimes I actually plan out what my meals are going to be for the week. It doesn't happen often, but it does upon occasion, and this recipe of fried chicken appears on rotation when possible. 


    It's got a bit of a kick, but it's still super moist. My husband is picky, but he completely devoured everything with this chicken in it. 

    Not to say that this is a hard recipe. All the planning that you really need is sticking chicken in a Zip-loc bag with buttermilk. Sometimes that's hard, though! So when you need a great meal, consider this recipe. 

    Buttermilk fried chicken


    6 boneless chicken breasts
    2 cups buttermilk
    1 cup all-purpose flour
    3/4 tablespoon season salt
    3/4 tablespoon cajun seasoning of your choice
    1 tablespoon kosher salt
    3 cups cooking oil

    • Place your chicken breasts in a large freezer bag with the buttermilk. Place it in the refrigerator for 2-3 days.
    • In a large dish, mix your flour and seasonings together. Remove the chicken from the buttermilk, and allow the extra buttermilk to drip off.
    • Dredge your chicken in the flour mixture. Make sure to coat well. 

    • Once all of your chicken is coated, heat your oil in your skillet or Dutch oven. Add the chicken pieces in a single layer. If it doesn't fit, fry your chicken in two batches. 

    • Cook your chicken until it's golden brown al over, and cooked through. This might take 8-10 minutes. If you use chicken with bone in, you'll want to cook it a while longer. 
    • Transfer the chicken to a plate with a paper towel, and allow the excess to drain.

    • The chicken will taste great with something spicy, like a salsa fresca, or something creamy, like mashed potatoes. Enjoy. 

    Saturday, March 8, 2014

    Amazing Apple Challah

    Now that I’ve overcome my fear of yeast, I really wanted to have some fun with sweet bread.

    There’s nothing better than a great piece of sweet bread, typically with fruit, toasted and buttered in the morning. I decided to make my own. I found a beautiful recipe for challah bread, and couldn’t wait to adapt it to my own preferences.


    This bread is light. It’s fluffy. The crust captures all of the delicious and makes you smack your lips. Enjoy!

    Apple Challah


    Bread ingredients

    2 tablespoons dry yeast
    1 tablespoon plus ¾ cup granulated sugar
    5 large eggs
    ¾ cup vegetable oil
    ¾ teaspoon kosher salt
    6 cups flour


    Filling ingredients

    1 large firm-tart apple, peeled, cored, and cut into small cubes½ cup raisins (I opted not to use these)
    3 tablespoons lemon juice
    2 tablespoons honey
    ½ teaspoon ground cinnamon
    1 egg yolk

    • Combine ½ cup of warm water, the yeast, and 1 tablespoon of sugar in a small bowl. Stir until the yeast dissolves. You need to wait for the mixture to activate, which should take approximately 10 minutes.
    • Take your hand mixer or (if you’re lucky) standing mixer, and beat the eggs at medium speed until blended. Add the oil, salt, and remaining ¾ cup sugar. Beat until pale in color. Add 2/3 cup of water and yeast mixture. Once this has been well blended, add your flour, one cup at a time.

     
    Your dough will be slightly dry.
    • Place your dough onto a floured surface and knead for 2 minutes (This can also be achieved with the use of a dough hook on your mixer for 1 minute at low speed). Put the dough in a lightly oiled bowl and coat the entire batter. Cover with plastic wrap and a kitchen towel and put in a warm corner of your kitchen to rise. Allow for the dough to double in size, which takes just about an hour.
    • Punch down the dough, rewrap with plastic wrap and a kitchen towel, and let the dough rise for another 30 minutes. It should puff up slightly, but it won’t get doubled in size.


    I used all spice instead of cinnamon; stupid allergies.
    • As you wait for this final rise, you can begin to make your filling. Take your apple, and toss it with lemon juice, honey, and cinnamon in a small bowl. Let sit for 20 minutes, and then drain any liquid. 

    • Take your dough, place it on a lightly floured surface and divide it in half. Divide each half into three equal parts. Roll out each of the three pieces to form a 12-inch strand, then try to pat each strand down into a flat rectangle. Spoon your apple mixture down the center of each rectangle. Fold over the dough to tuck your filling into place, and roll each rectangle, pinching the ends tight. You’ll end up with a 15-inch strand.
    • Preheat the oven to 400°F before you begin braiding the dough. Once the bread has risen, set the rack to the middle position.

    • Now to make the bread. Put three of the ropes on a baking sheet. Braid the ropes together, and pinch at the top and bottom. Repeat with the other three strands on a separate baking sheet. Cover the loaves with kitchen towels, and let them rise for 45 minutes.


    • Whisk an egg yolk with 1 tablespoon water and brush over the tops of the loaves.

    • Finally, bake your loaves for 10 minutes, then reduce the heat to 350°F and bake until the crusts are browned and the bread is puffed and light, which should take another 30 minutes.

     
    Look at how pretty!
    • Transfer the loaves to a rack and let cool for 30 minutes before serving.


    Tuesday, March 4, 2014

    Delicious dinner rolls, Texas Roadhouse Style

    I love eating bread. It’s not uncommon for me to sit across from the panaderia (That’s a Mexican bread shop, for you gringos) and drool until the freshest buns come out. Then I inhale them. 

    I’ve always wanted to try my hand at making bread, but was always terrified about the idea of working with yeast. Yeast. It sounds horribly difficult. However, if you’re afraid of something, face it head on. So here we go. I decided to follow a great recipe that I pulled off of Deliciously Yum. She mimicked Texas Roadhouse Rolls, which are sweet. Buttery. Delicious. It’s like eating a pillow and a marshmallow, but a lot better, because no one frowns on it.


    So… don’t be afraid like me. Don’t be ashamed to eat these. Enjoy. Don’t share.


    Wannabe Texas Roadhouse Dinner Rolls


    Yields 18

    2 1/4 (1 envelope) active dry yeast
    1/4 cup lukewarm water
    1 cup lukewarm milk
    3 tablespoons melted butter, slightly cooled
    1/4 c. sugar
    4 cups all-purpose flour
    1 large egg
    1 teaspoon salt
    melted butter for basting rolls

    Instructions
    1. Combine yeast and lukewarm water in your bowl and let stand for 10 minutes (until yeast starts to foam and bubble).


    2. Add milk, melted butter and sugar to the yeast mixture and mix well. If you’re luckier than I am and have a standing mixer, use the paddle attachment. 

    3. Add 1 cup to 1 1/2 cups of flour to make a batter.  You want it to be very wet.


    4. Add egg and salt and mix well. Again, if you have a mixer, switch to the dough hook and with the mixer running on medium speed, add remaining flour. Continue mixing for 5 minutes or until dough is smooth. I used my mixer, and a rubber spatula. 


    5. Sprinkle some flour onto the counter and place dough on top. Let it rest for 10 minutes. While it rests, grease another bowl with butter. Place dough inside. Cover the dough with a clean kitchen towel and place in a warm place until dough has doubled in size, about 1 hour.

    6. Remove from the bowl and punch dough down. Place dough on floured surface and roll out into a square about 1/2 inch thick. 
    7. Cut your dough into rectangles, about 3 inches by 2.5 inches. Place dough onto a parchment-lined baking sheet. Cover with a towel and let rise again until doubled in size, about 45-60 minutes.


    This is far too long. I had to recut these bad boys down.


    Now we let them RISE.
    Nice and puffy.

    8. Preheat oven to 350 degrees and bake for 10-15 minutes. You’ll know it’s ready because the bun tops will be golden. Remove from oven and baste those buns with melted butter.


    9. Enjoy them quickly. 

    Saturday, March 1, 2014

    Rainy day carne asada tacos

    It's properly raining in Southern California. I mean, actual tornado warnings to the north of us. Because of that, in addition to me twisting my ankle, I've not been in the mood to make pretty food. I needed to purchase groceries, and it felt like I needed to get an ark ready in order to get home.

    However, I did successfully buy food for the month, and was once again inspired. My grandmother gave me a bag of avocados, and now that they're ripening, I need to make things with them. 

    First on my list, carne asada tacos with avocado salsa fresca. It's something fast, delicious, and can be tailored to your preferences. Enjoy this with as much toppings as you prefer!


    No forks necessary.

    Carne Asada Tacos with Avocado Salsa Fresca


    yields approximately 12 fat tacos

    1 1/2 lbs beef sirloin, your choice
    1/2 lemon
    12 corn tortillas
    1 large tomato
    1/3 cup cilantro
    1 serrano pepper
    2 green onions
    1 avocado
    pre-cooked pinto beans (optional)
    shredded cheese (for garnish)


    • The night before you cook your taco meat, squeeze the 1/2 lemon onto the meat. Allow the meat to marinate for at least 3 hours so that the acidity breaks down the tough meat.


    •  Heat your skillet to medium high.
    • As you wait for your skillet to heat, begin to slice your meat into large cubes. As you dice your meat, season your meat with your preferred seasonings. I enjoy salt, pepper, and Cajun seasoning. 


    • Let your meat cook until it begins to sear, and there is no more juice in the pan.

    That meat will simmer for about 10-15 minutes, depending on your stove, your pan, and your preference of done-ness. Now... the salsa!

    • Chop your cilantro finely. 
    • Dice up your tomato, as well as your green onions, and add it to your cilantro. Don't get rid of the tomato juices; add that as well. It adds flavor. 
    • Finely chop your serrano pepper. These babies can be pretty spicy, so add a small big of pepper at a time, mix, and taste for heat. Don't overdo it.

    • Finally, slice your avocado. Make wide cubed cuts of the avocado while it is in the pit, then carefully spoon it out onto the rest of the salsa. Add salt to taste, a dash of water and a tablespoon of lemon juice. 
    • Mix carefully so that the avocado chunks don't disintegrate. 
    Look at those colors. Chunky is pretty.

    And now, the moment we've been waiting for. Taco building time.
    • In a small sauce pan, heat your tortilla. Let the pan get hot, and allow both sides of your tortilla to toast, approximately 2-4 minutes, depending on how crispy you want your tortilla to be. Place on your plate and begin building.
    • Drizzle your meat chunks onto your tortilla. If you prefer smaller sized meat pieces, slice them once the meat has rested. 
    I had some pinto beans in the fridge, and added them to my taco. I love beans in my taco. 
    • Top your taco with shredded cheese, and then garnish with the salsa. Serve immediately!
    Ay que taco!